In today’s digital era, navigating the realm of project management requires a keen understanding of its multifaceted nature. With the emergence of numerous online tools, one solution stands out as a true game-changer: ClickUp. This versatile platform has revolutionized project management by providing a highly adaptable and comprehensive toolkit. Within this article, we will embark on a comprehensive journey to master the art of project management using ClickUp.
Unveiling ClickUp’s Structural Framework
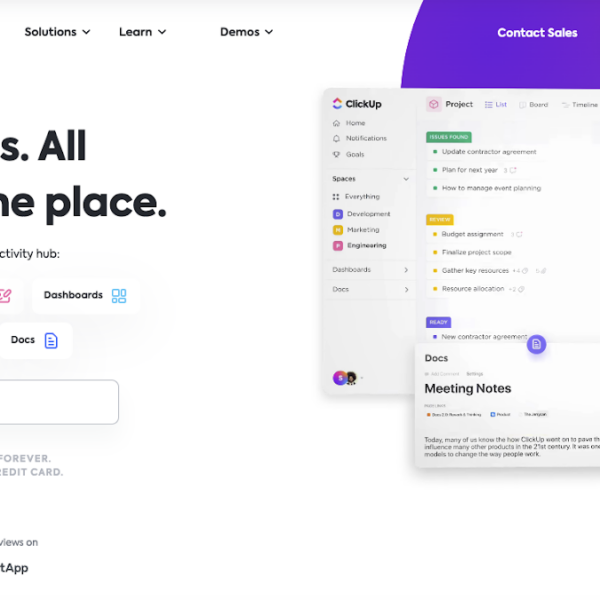
To fully grasp the power of ClickUp, we must first unravel its structural hierarchy. ClickUp’s foundation is built upon a hierarchical framework, encompassing a series of vital elements. These key components include:
- Workspace: The Workspace is the highest level of organization in ClickUp. It encapsulates all your Spaces, Folders, Lists, and Tasks;
- Spaces: Spaces are created within the Workspace and can represent distinct departments, teams, or large-scale projects;
- Folders: Folders reside within Spaces and categorize your tasks into distinct groups;
- Lists: Lists are found within Folders and contain related tasks that further break down your projects;
- Tasks: Tasks are the atomic units of work in ClickUp. They represent the action items that need to be completed.
Effectively Using ClickUp for Project Management
To effectively harness the power of ClickUp for project management, it is crucial to understand and utilize its various elements. This guide will walk you through the process, utilizing tables, bullet lists, and paragraphs for better organization.
1. Setting Up Your Workspace
To establish your Workspace, follow these steps:
| Step | Description |
|---|---|
| 1 | Click on your profile avatar on the left side of the screen. |
| 2 | Select “Add Workspace” from the options. |
| 3 | Customize the Workspace settings and invite team members via email. |
By creating a Workspace, you create a digital hub for your projects, encompassing Spaces, Folders, Lists, and Tasks.
2. Creating Spaces
Spaces allow you to organize your projects and departments. Follow these steps to create a Space:
| Step | Description |
|---|---|
| 1 | Click on the ‘+’ sign beside the Spaces domain in your Workspace. |
| 2 | Fill in the Space details, including name, avatar, and access settings. |
| 3 | Determine visibility: public or private. |
| 4 | Customize statuses for tracking progress. |
Spaces serve as realms that mirror your organization’s structure or embrace specific projects.
3. Organizing with Folders and Lists
Folders and Lists help structure your tasks within Spaces. Here’s how to organize them:
| Step | Description |
|---|---|
| 1 | Create Folders within relevant Spaces to group related tasks. |
| 2 | Name your Folders based on project aspects or categories. |
| 3 | Create Lists within Folders to break down tasks further. |
| 4 | Assign tasks to appropriate Lists based on their aspect. |
Well-structured Folders and Lists ensure logical organization and ease of tracking.
4. Generating Tasks
Once your Folders and Lists are in place, you can start creating tasks for your projects:
| Step | Description |
|---|---|
| 1 | Within the relevant List, click “+ New Task” to create a task. |
| 2 | Provide a name for the task and add details such as assignees, due dates, priorities, and descriptions. |
| 3 | Enhance tasks with attachments, comments, and checklists. |
| 4 | Consider breaking tasks into subtasks for better organization. |
Tasks represent the work to be done for your projects and can be customized to fit your specific needs.
By following these guidelines, you’ll be able to utilize ClickUp’s elements efficiently and manage your projects with utmost effectiveness.
Leveraging ClickUp’s Key Features

With the fundamental structure in place, it’s now time to explore the key features that make ClickUp such a powerful project management tool.
Custom Fields
Custom Fields are one of ClickUp’s most flexible features. They allow you to add additional task information, making tasks more useful and project management more efficient.
Custom Fields come in several types, including text, number, dropdown, checkbox, date, and more. For example, if you’re managing a software development project, you could create a dropdown Custom Field for “Programming Language” with options like “Python”, “Java”, “C++”, etc.
Time Tracking
Effective project management often involves keeping track of how much time is being spent on tasks. ClickUp’s built-in time tracking feature is excellent for this purpose. You can start a timer directly within a task, or manually add time if you forgot to start the timer.
Furthermore, with ClickUp’s Chrome extension, you can even track time when you’re not on the ClickUp website. All tracked time can be viewed in the task view or the Box view, and exported for reporting or invoicing purposes.
Gantt View
A Gantt chart is a type of bar chart that illustrates a project schedule. It’s a visual way to view tasks scheduled over time and is especially useful in project management.
ClickUp’s Gantt view feature lets you create interactive Gantt charts for your projects. You can schedule tasks, set dependencies, and track progress all in one place. It provides a visual representation of your project timeline, allowing you to see at a glance when each task is scheduled to start and finish, how long each task is scheduled to last, and where tasks overlap with each other.
Automations
ClickUp’s Automations feature allows you to create automation rules to streamline your workflow. These rules are made up of Triggers and Actions. When a Trigger event occurs in ClickUp, the corresponding Action is automatically performed.
For example, you could set up an Automation such that when a task’s status is changed to “Done”, the assignee of the task is automatically changed to a certain user. This could be useful in workflows where one user performs a task, and once they’ve finished, it’s someone else’s turn to review the task.
Dependencies
ClickUp allows you to create Dependencies between tasks, which can be useful when certain tasks can’t be started or finished until other tasks are completed. You can create two types of dependencies in ClickUp: “waiting on” and “blocking”. A task that is “waiting on” another task can’t be started until the other task is completed, while a “blocking” task prevents another task from being completed until the blocking task is finished.
Setting up Dependencies can be done directly in the task view, and you can also view all dependencies in a List, Folder, or Space in the Gantt view.
Collaboration Tools
Effective project management requires efficient collaboration, and ClickUp offers several features to aid in this. For example, you can assign comments to team members, effectively turning comments into action items. You can also “@” mention team members in comments to get their attention.
Moreover, ClickUp has a Chat view where you can hold real-time discussions with your team, and a Doc view where you can create detailed documents directly in ClickUp. These features make it easy to collaborate with your team and keep all your project-related discussions and documents in one place.
Integration
ClickUp integrates seamlessly with a plethora of other tools that you might already be using. This includes apps like Google Drive, Slack, GitHub, Outlook, and more. With these integrations, you can streamline your workflow and avoid constantly switching between different apps.
Reporting
ClickUp’s reporting feature provides insights into your project’s progress and team’s productivity. You can create customized reports to track various metrics like tasks completed, time tracked, and more. The reports can be viewed as bar charts, pie charts, or line charts, and can be shared with your team or stakeholders.
Conclusion
Unlock the boundless possibilities of ClickUp for seamless project management. Dive into the realm of productivity as you craft workspaces tailored to your needs, while harnessing the power of custom fields, automations, and integrations. Experience the all-encompassing platform that empowers you to efficiently and effectively oversee your projects. With ClickUp as your trusted project management companion, you’ll confidently conquer any endeavor that lies ahead.
FAQS
Yes, ClickUp allows you to change the access permissions of a task. By default, all tasks are visible to all members of the Space they’re in. But you can change a task’s visibility to “Me Only” or “Custom”, which allows you to select specific people who can see the task.
Yes, ClickUp offers a great deal of flexibility in managing notifications. You can choose to get notified about specific events like when a task is created or a comment is posted, and you can also select how you want to receive these notifications (via email, mobile push, desktop push, etc.).
Yes, ClickUp is available as a mobile app for both iOS and Android. The mobile app has most of the functionality of the web app, allowing you to manage your projects on-the-go.
Yes, ClickUp supports importing data from several other project management tools including Asana, Trello, and Jira. This makes it easy to switch to ClickUp from another tool without losing any of your data.